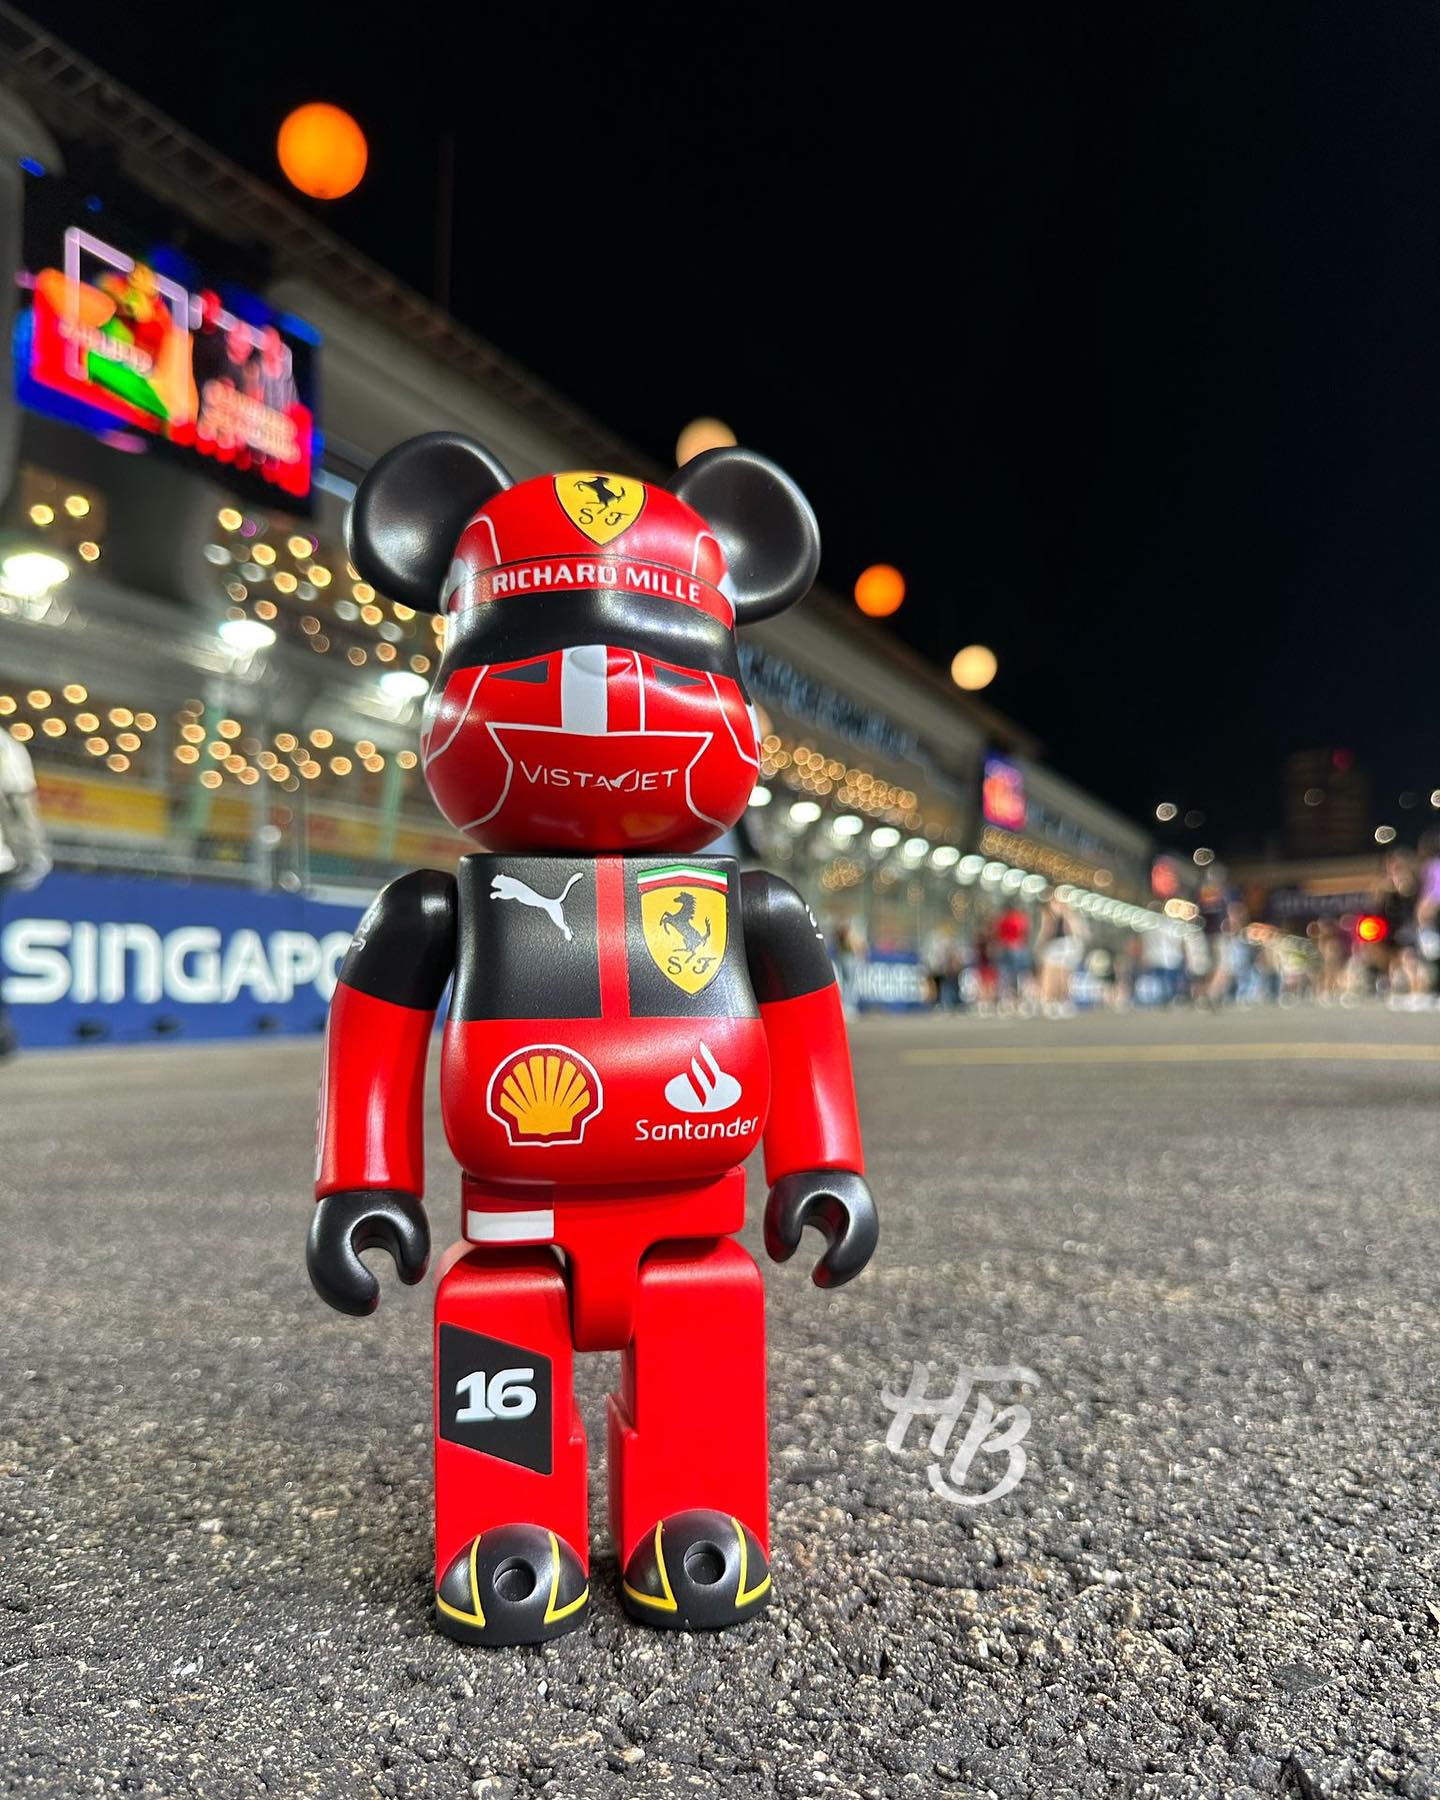
This isn't Charles Leclerc's ride — but it belongs to someone who loves the prancing horse just as much. Our client, a true F1 fanatic, came to us wanting a custom Bearbrick that truly captured the spirit of Ferrari racing. Here's the full process, step by step, exactly as we built it. No shortcuts, no compromises.
Ferrari Bearbrick — Commission Preview
One-of-a-kind Charles Leclerc Bearbrick 400%
Behind the Build
The Full Customisation Process
01 - foundation
Start with the Real Thing
We only ever work with authentic Medicom Toy Bearbricks — no knock-offs, no bootlegs. The quality and structure of a genuine Medicom piece is what makes everything else possible. A real Bearbrick holds paint differently, sands so much cleaner, and is honestly worth the investment if you want a true collector-grade finish.
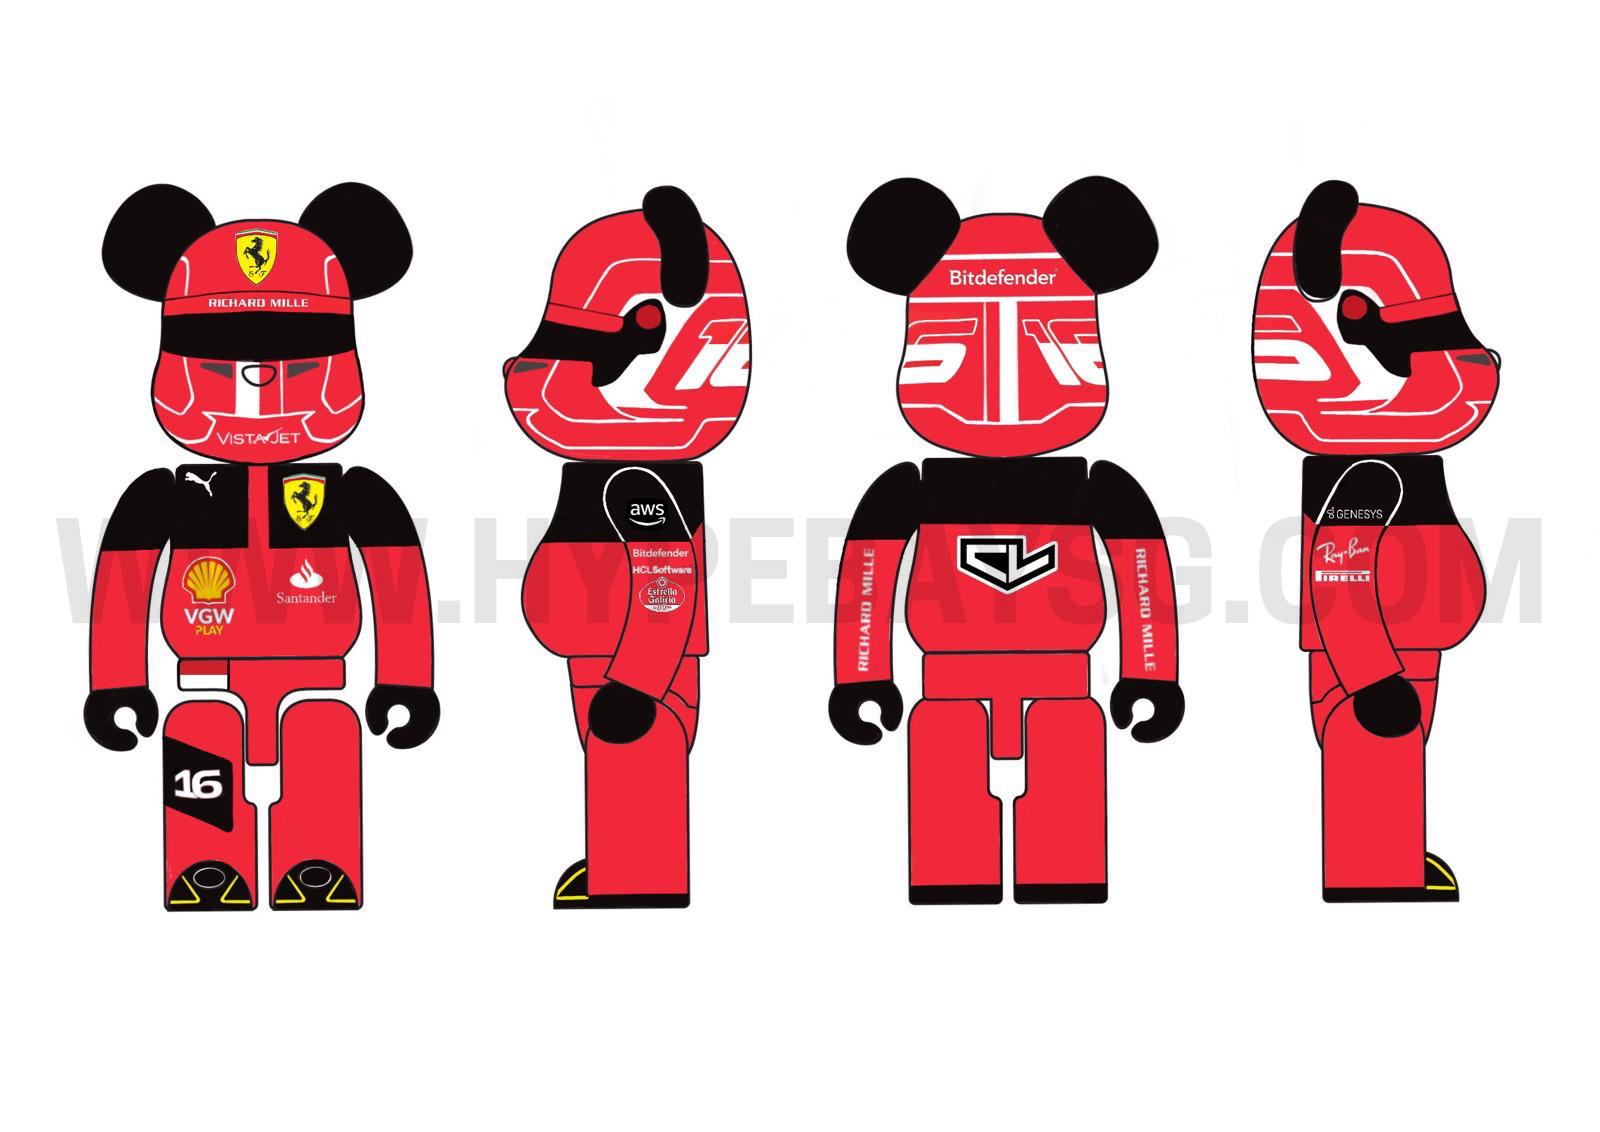
02 - Design Phase
Mock Up the Design First
Before a single drop of paint goes on, we mock up the whole design digitally — mapping out every colour zone, stencil placement, and detail onto the Bearbrick's body panels. For this Ferrari commission, we planned the Rosso Corsa red base, the signature yellow racing stripe, the Scuderia shield on the chest, and the tyre-tread feet, all ahead of time. This step saves us (and you) from costly mistakes further down the line.
Pro tip
Here's a tip we always share: the simpler the design, the cleaner the result. Fewer stencil layers means crisper edges and less room for error.
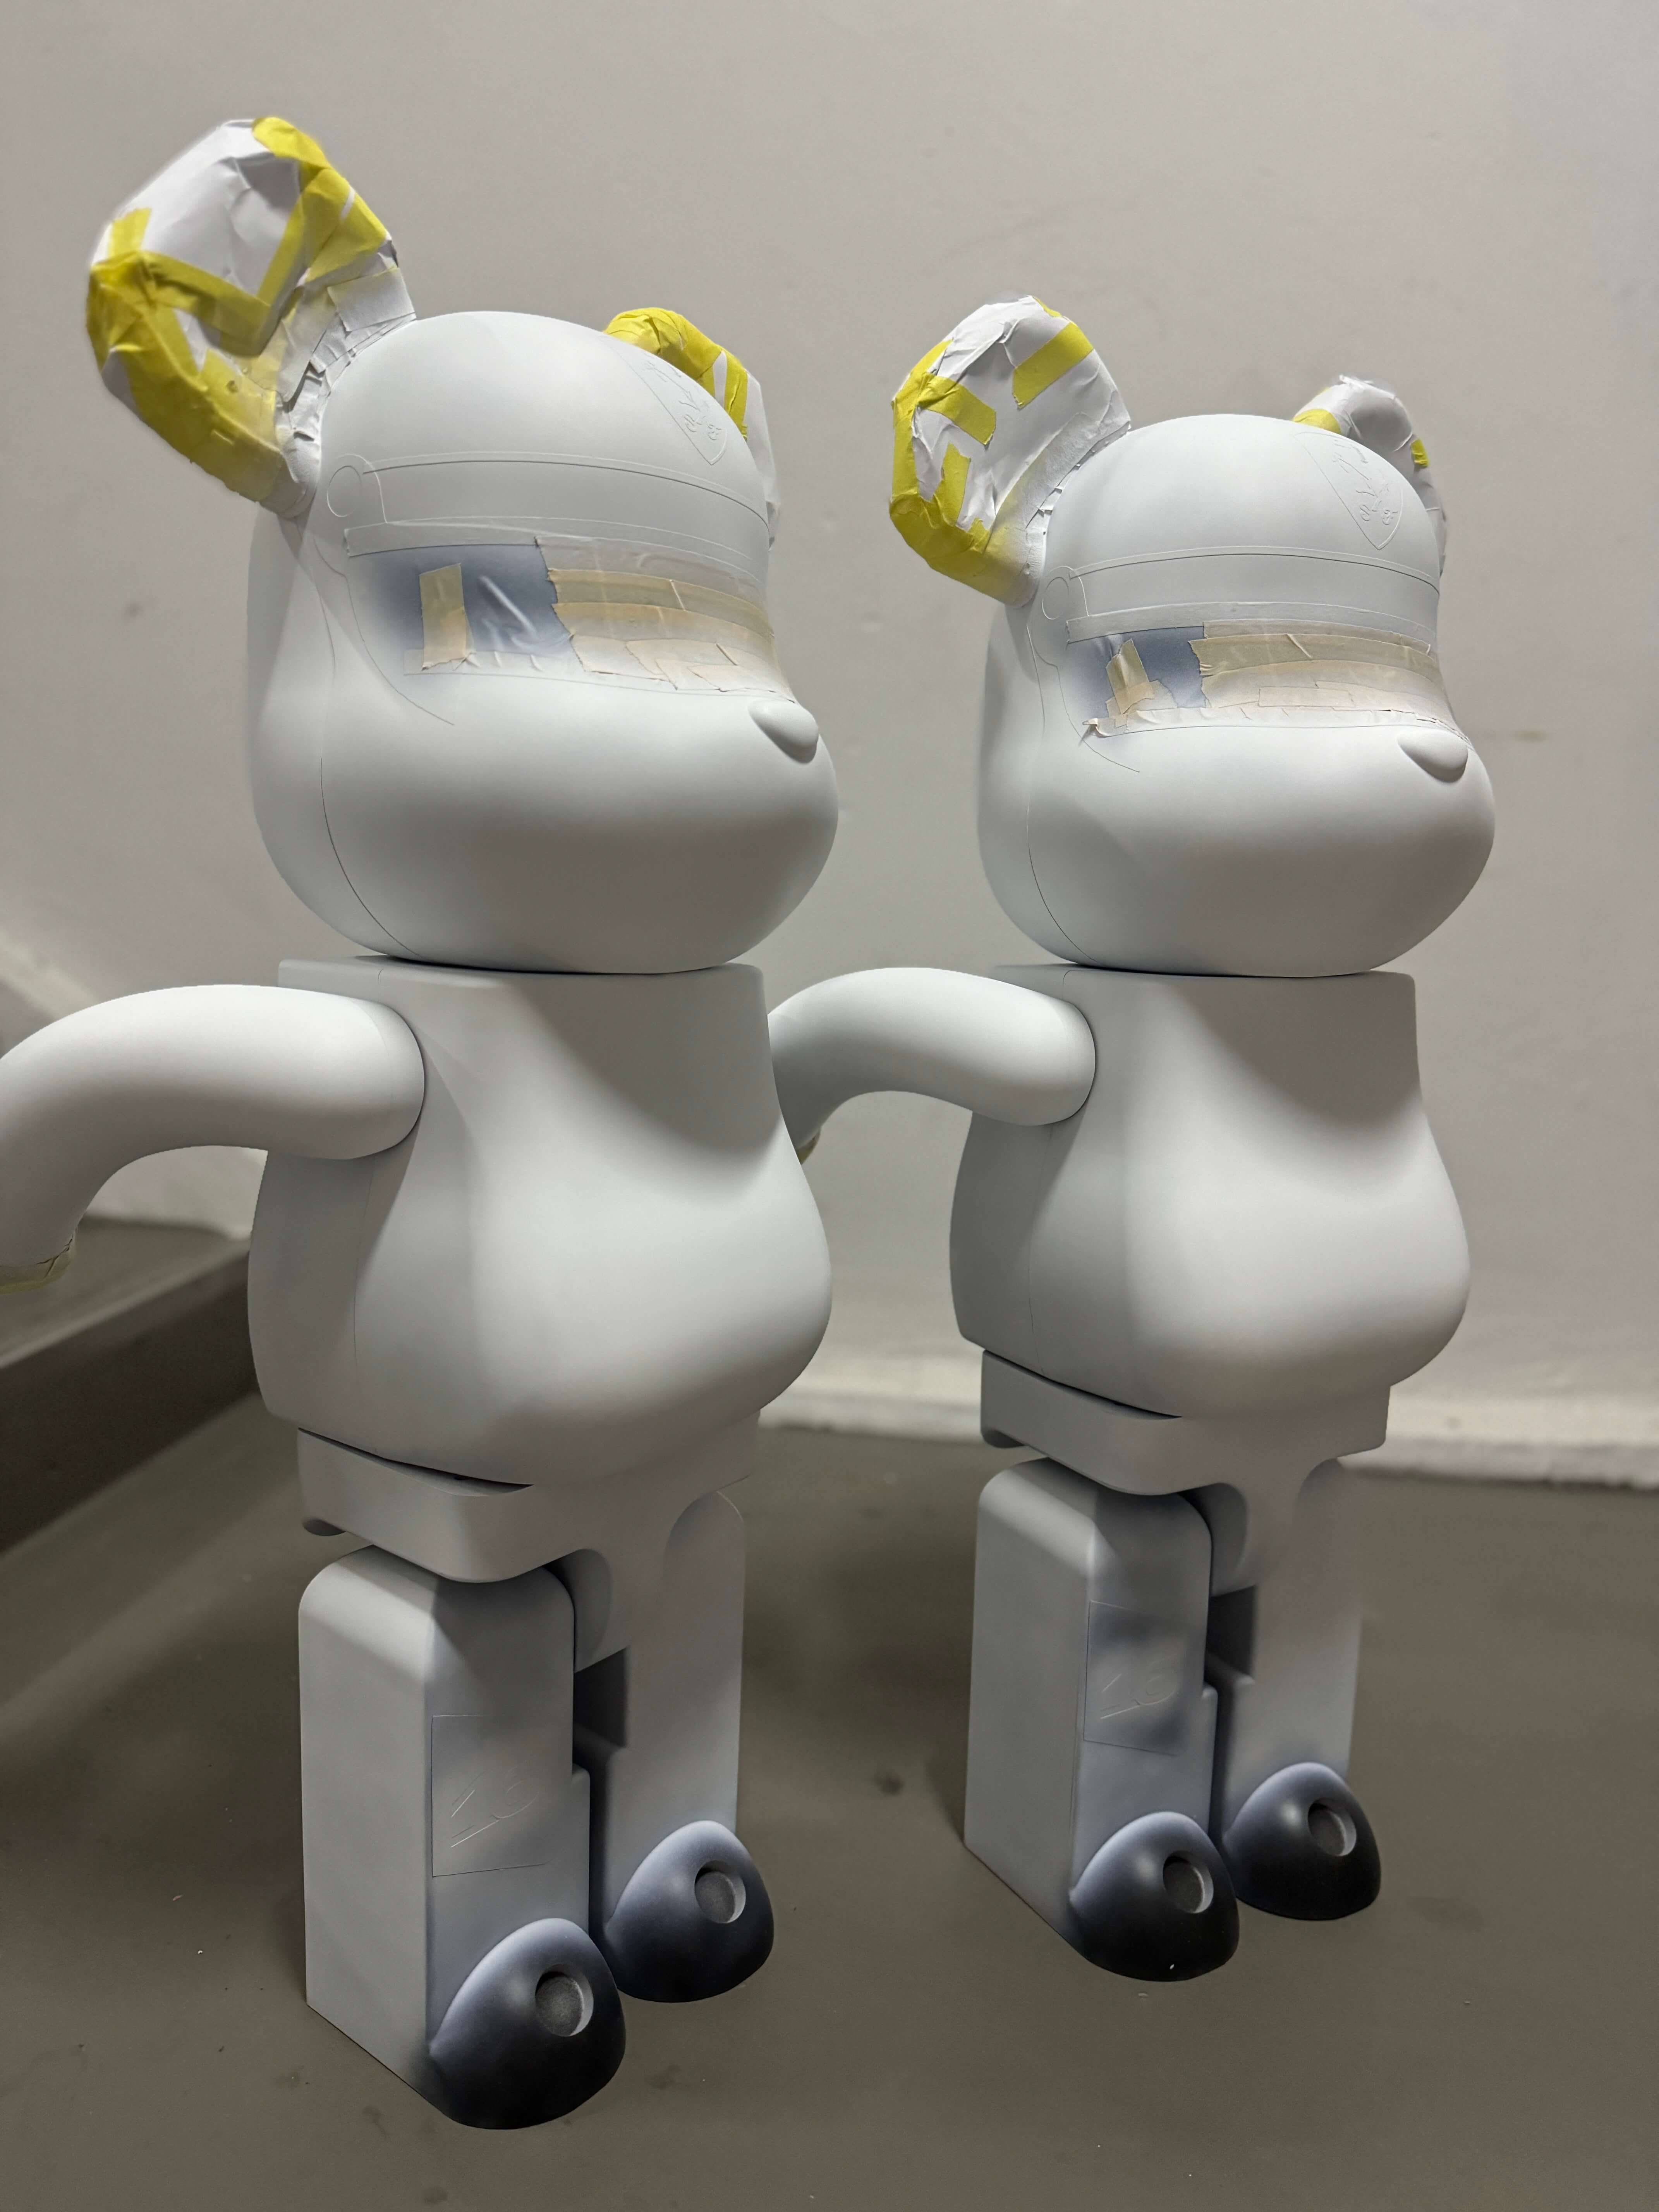
03 - prep work
Sand Down the Factory Finish
Every Medicom Bearbrick arrives with a factory paint or gloss finish, and we sand this down completely to create a raw, receptive surface for our custom paint. Simpler factory designs sand down much faster, while heavily printed or pre-painted variants take considerably more prep time — which is why that's reflected in the commission timeline and complexity.
Tip
Choosing a plain or single-colour factory Bearbrick as your base makes the whole process smoother and faster. For delivery, a standard custom commission takes about 5–7 working days, while larger figures (1000%) or especially detailed designs will need a bit more time. If you're thinking of commissioning one, the earlier you reach out to us, the better!
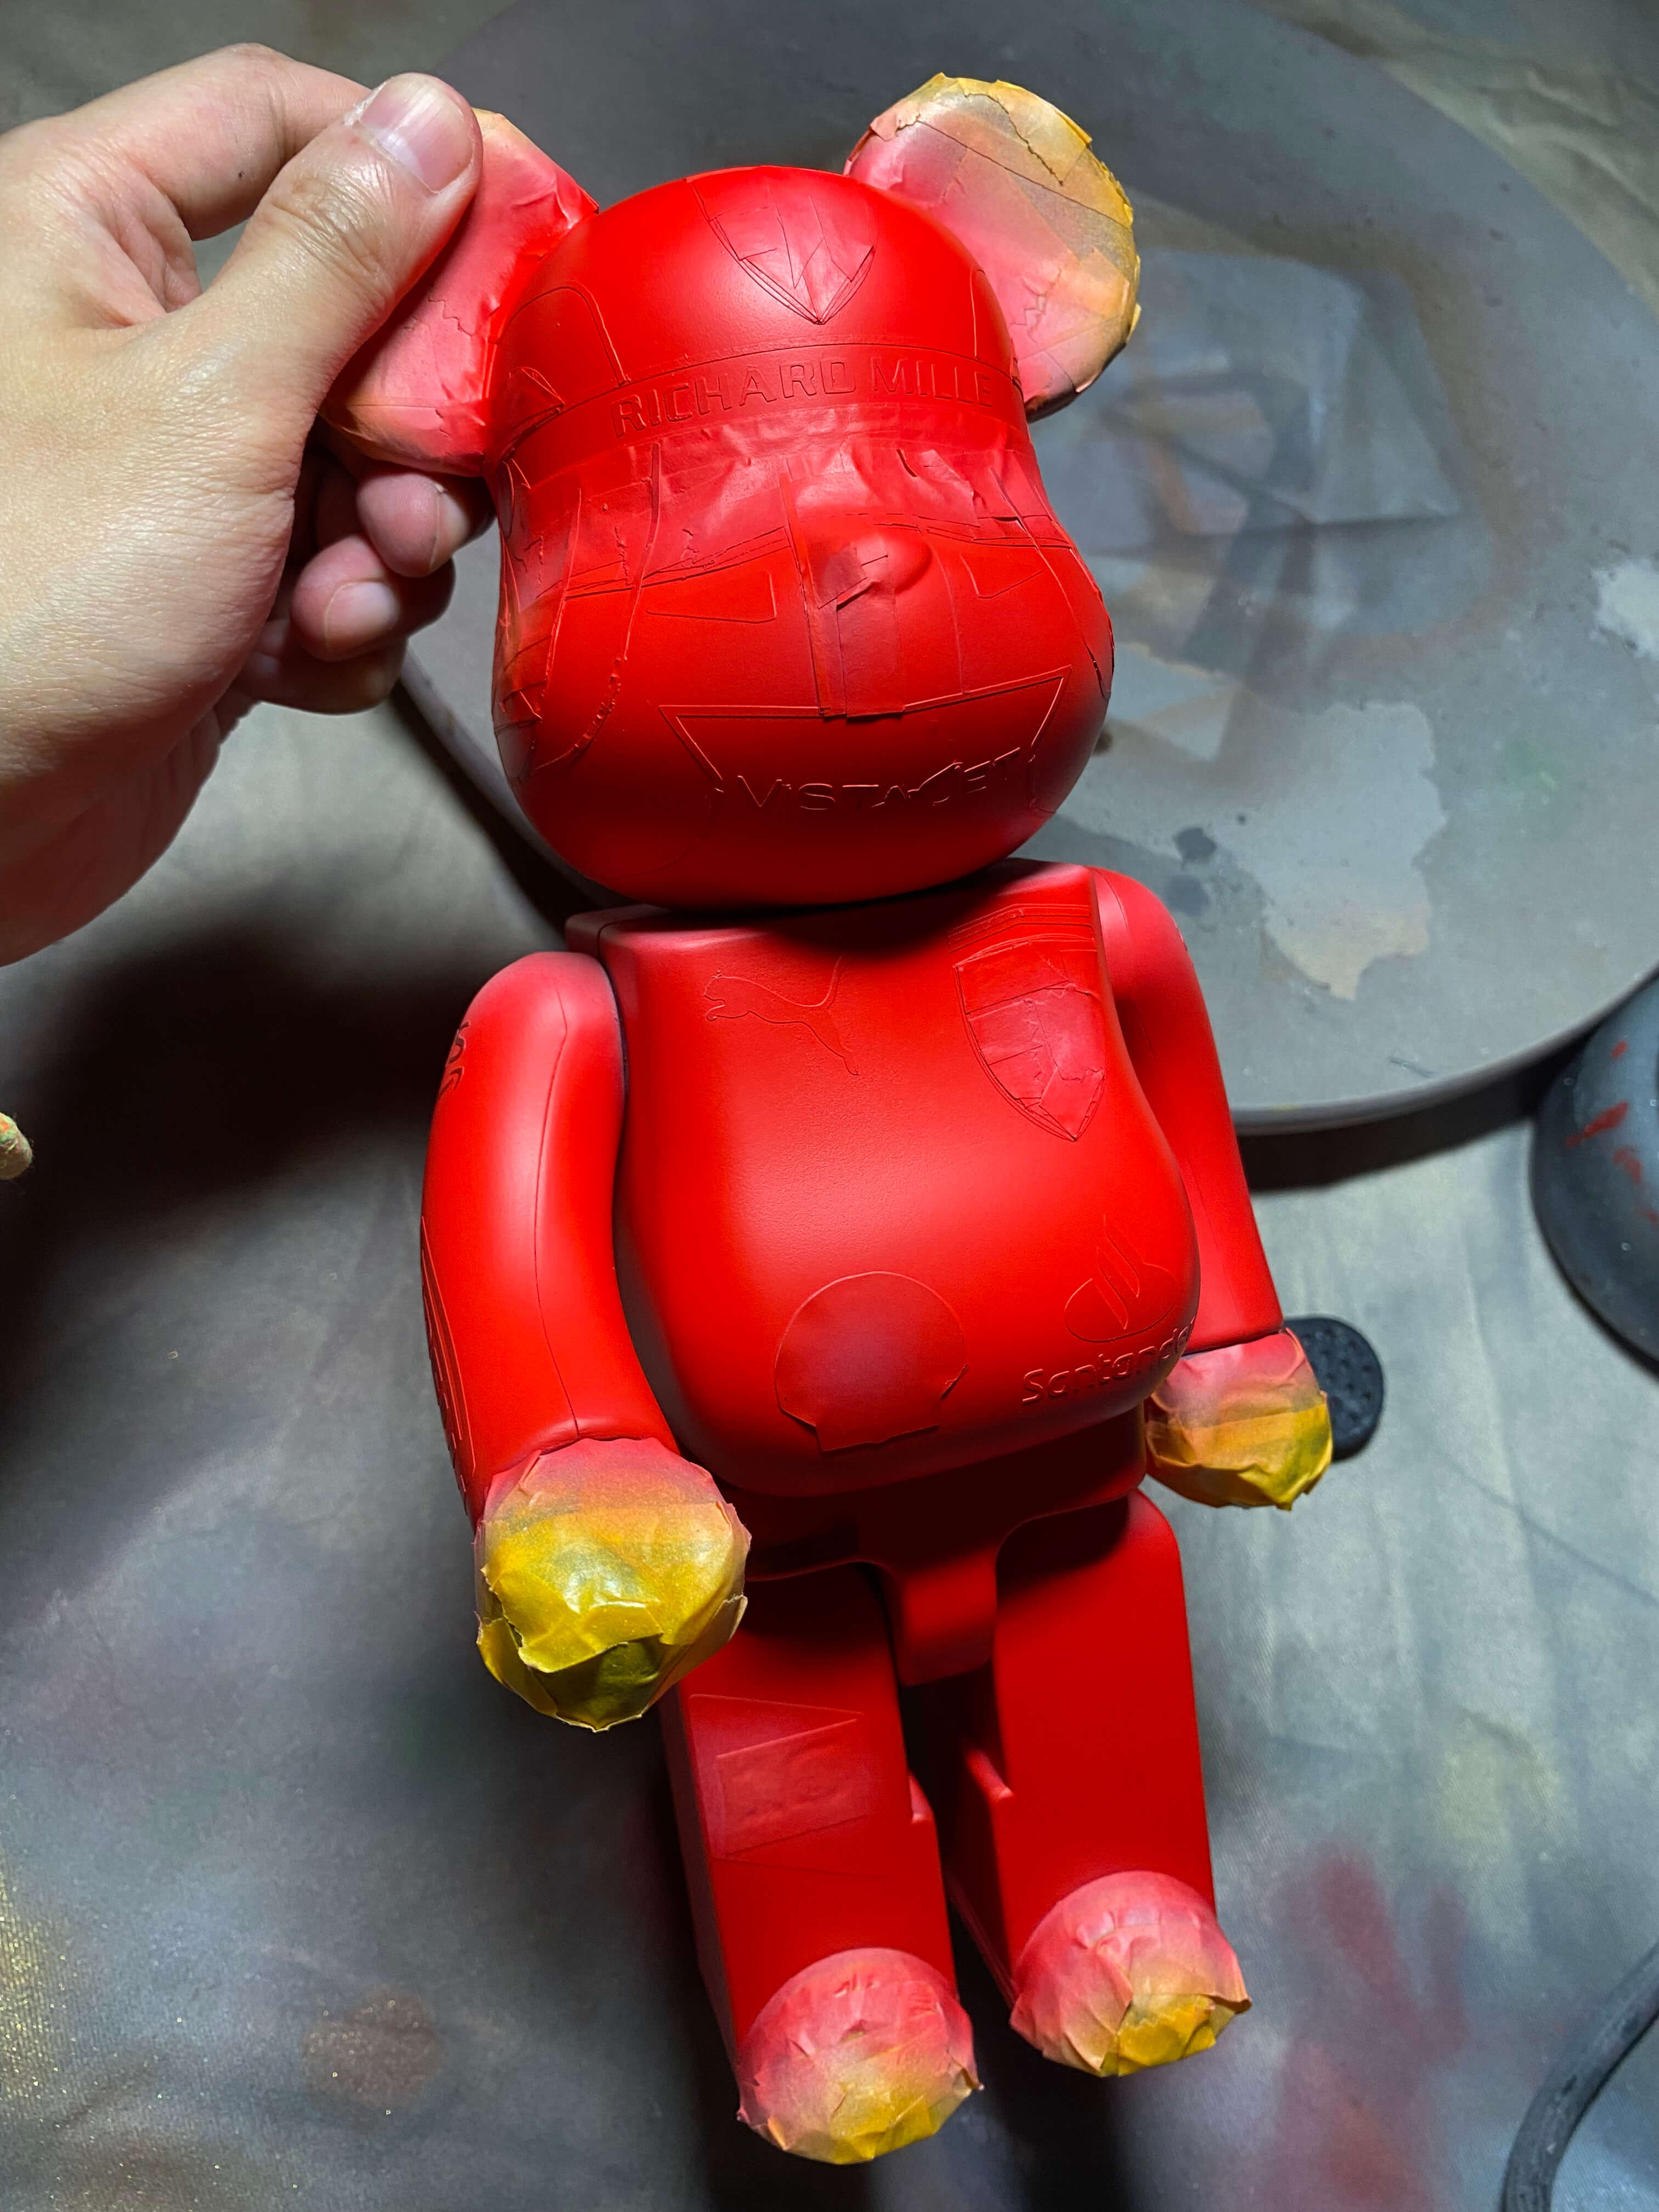
04 - priming
Apply a Thin, Even Primer Coat
Once sanded, the whole Bearbrick gets primed. We apply a minimal, even coat — never thick or heavy — just enough to seal the sanded surface so it's ready to accept paint, without adding bulk that could crack or peel down the road. Think of it as the invisible foundation that makes everything on top last.
05 - Colour Strategy
Nail the Design Order — Colour by Colour
The painting sequence really is everything. We always spray the lightest or largest colour first, then work our way toward darker, more detailed layers. For this Ferrari piece, the Rosso Corsa red went on first as the base coat, followed by masking and stenciling the yellow racing stripes, then the black detailing, and finally the Scuderia shield graphic. Get the order wrong, and it means repainting — and a lot more sanding!
Why it matters
Each stencil sits on top of a fully dried layer beneath it, protecting the work we've already done while the new colour goes on cleanly right beside it.
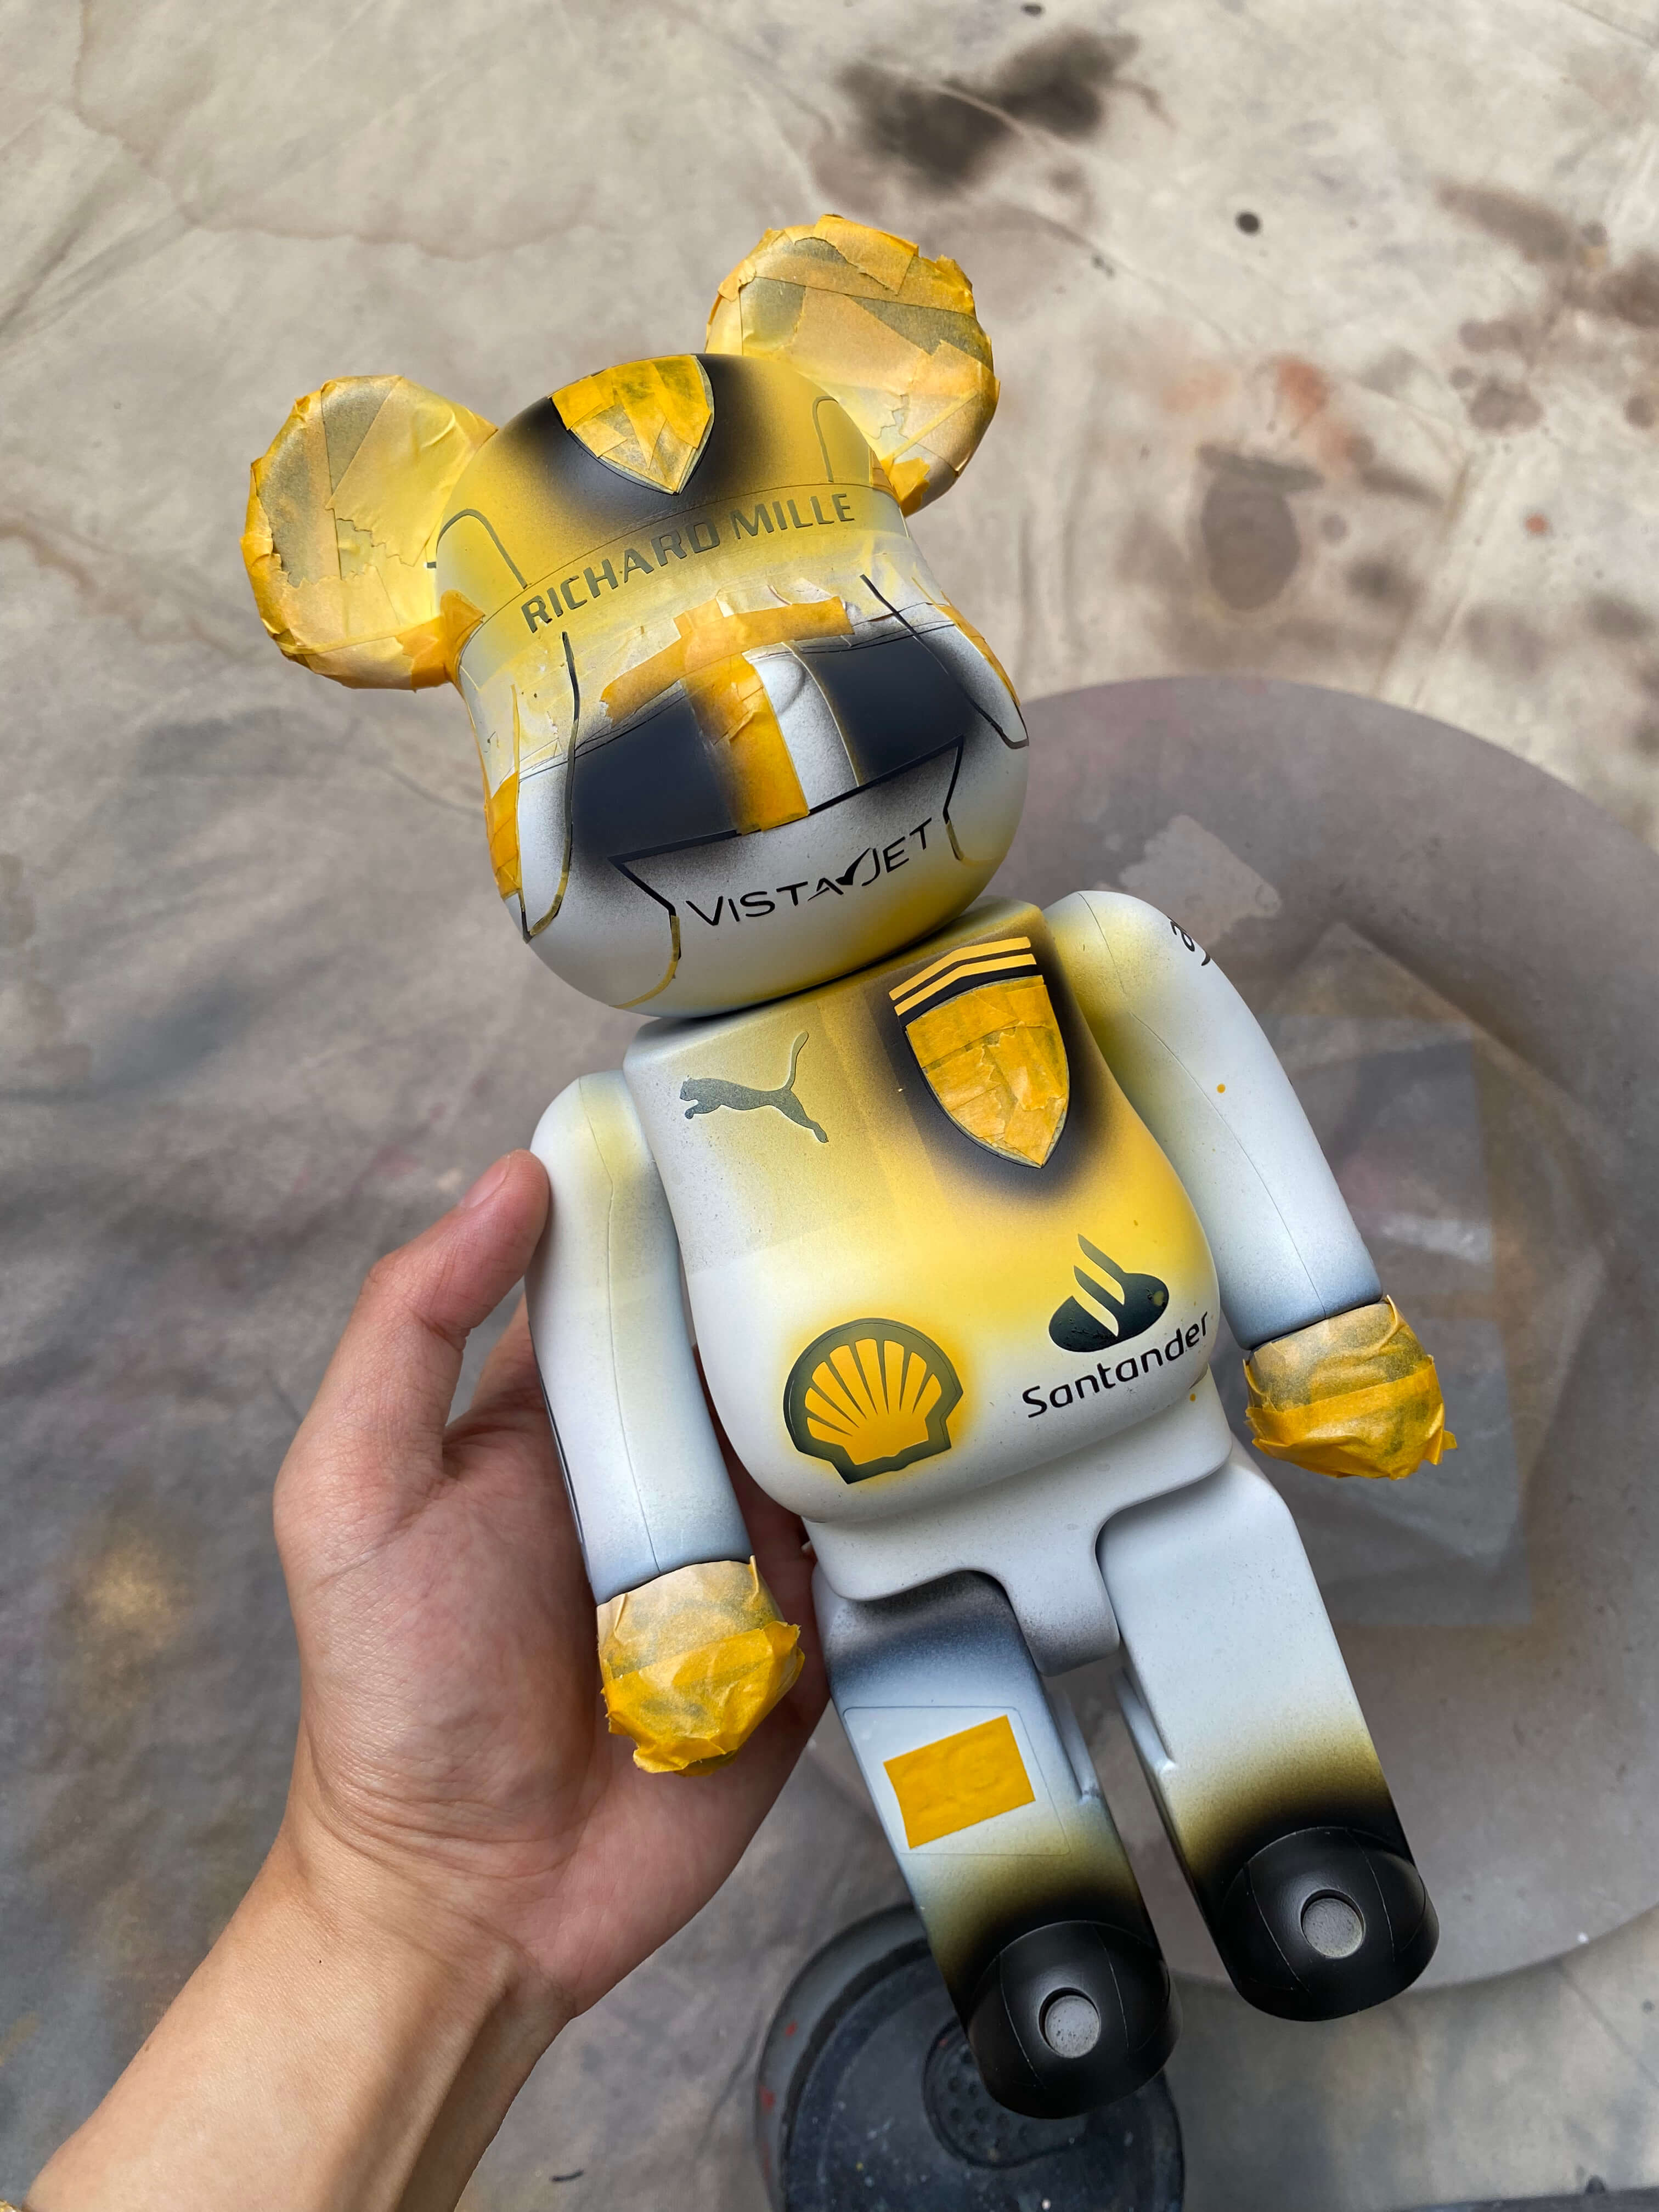
06 - Application
Ultra-Fine Airbrush Technique
This is really where the magic happens. We use an ultra-fine airbrush rather than rattle cans or hand brushes, which lays down a micro-fine mist of paint that settles evenly onto the surface with zero brush strokes and almost no splatter. The result is a finish that looks factory-smooth, or even better. Up close, you'll spot all the little details. From a distance, it just reads as clean and intentional.
07 - Patience
Layer by Layer — Wait for Each Coat to Set
We never rush this part. Between every layer of paint, we wait patiently for each coat to fully cure before touching it again. Once it's set, we can safely tape over it, lay a stencil on top, and spray the next colour right beside the previous one without any bleed or lifting. Patience here is really what separates a crisp finish from a muddy one.
Each layer:
It's simple, really: spray → let it set → tape or stencil → spray the next colour → repeat.
08 - Protection
Varnish — The Final Seal
It's not quite a masterpiece yet — not until we varnish it. A final topcoat of clear varnish goes over the entire completed Bearbrick, sealing every layer of paint beneath it, creating a durable surface, and giving the piece its final finish, whether that's gloss, satin, or matte depending on the commission. Think of it the same way a vinyl toy's factory coat protects its print: the varnish is what keeps your custom piece looking fresh for years to come.
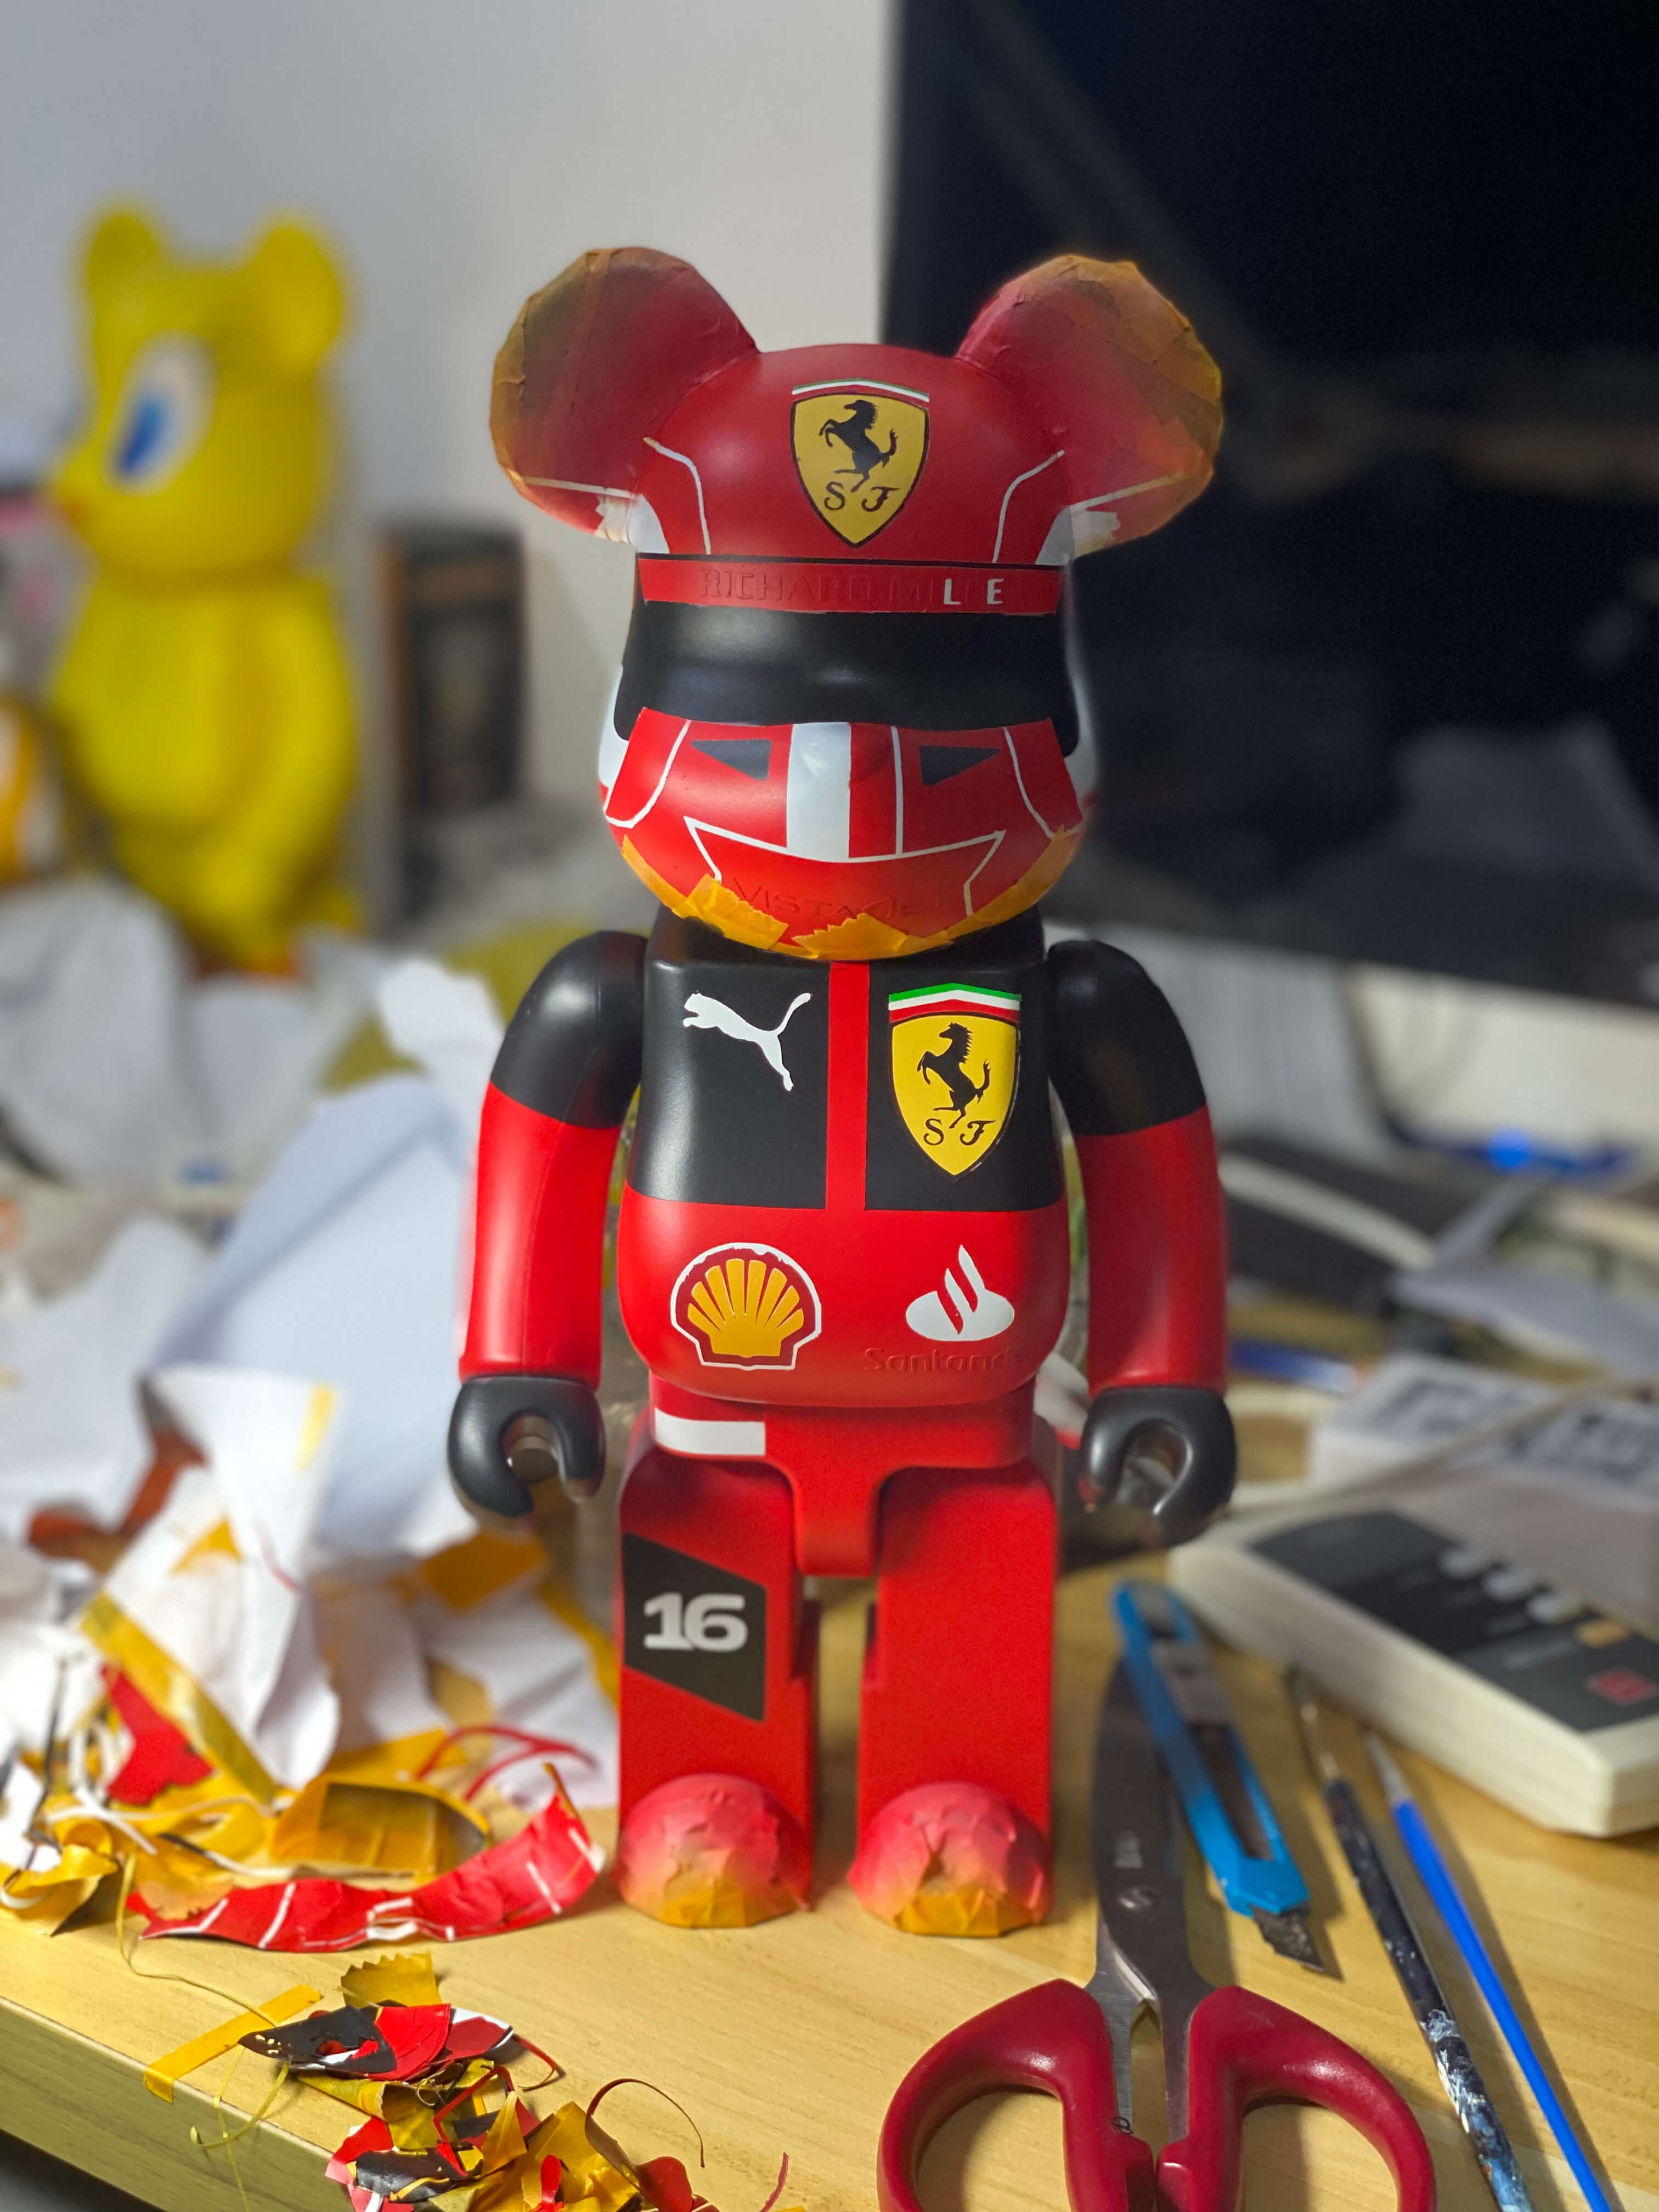
09 - Completion
Say Hello to Your Finished Piece
Once the varnish has fully cured, your custom Bearbrick is complete and ready to bring home! The joints — arms, legs, and head — can still be moved, but we'd recommend against repositioning it too often. Every twist and rotation creates friction at the joint edges where paint meets paint, and over time that will wear down the finish at those contact points. The less you move it, the longer it'll stay looking perfect.
Best practice:
Our advice: pose it once, thoughtfully, and then just let it live exactly like that.
Collector's Guide
How to Care for Your Custom Bearbrick
Store in a stable, movement-free spot
Keep your Bearbrick in a display case, shelf, or cabinet where it won't get knocked, bumped, or jostled around. Movement really is the enemy of any hand-painted surface — a glass display case is ideal, since it keeps the dust off and keeps curious hands away too!
Keep it away from direct sunlight and UV
Prolonged UV exposure will cause the colours to fade over time, especially reds and yellows. We'd suggest displaying it away from windows, or using a UV-filtering display case if you want it to last for the long haul.
Skip the cleaning sprays and solvents
If your piece needs a little dusting, a soft, dry microfibre cloth is all you need. Cleaning chemicals, even mild ones, can break down the varnish and damage the paint layers underneath.
Try to minimise joint movement
The arms, legs, and head can be repositioned, but each time you do, friction at the joint edges gradually wears the paint away. We'd suggest posing your piece once, ideally right after you receive it, and leaving it exactly like that from then on.
Disclaimer
Custom hand-painted finishes are naturally a little more delicate than factory-applied prints. Factory paints are baked and bonded at industrial temperatures, while our custom paints are applied by hand with real care — which just means they need a bit more thoughtful handling. With the right display and storage, though, your piece will stay in beautiful condition for years to come.
Commission Guide
What Kind of Designs Work Best
Not every design translates perfectly onto a Bearbrick, and we'll always be upfront with you about what works and what doesn't. Here's our honest guide:
Bold, Flat Colours
Single-colour fills, colour-blocked zones, and solid brand colours are where our airbrush work really shines. Clean, deliberate, and striking every time.
Logos & Simple Graphics
Shields, emblems, numbers, and icons all work beautifully with stenciling — think sports teams, brand marks, and other iconic symbols.
Stripes & Geometric Patterns
Racing stripes, panels, and geometric shapes are just tailor-made for masking and stencil layering, giving clean results every time.
Gradients
Less is more here! Subtle gradients are possible, but they add quite a bit of complexity and spraying time. We tend to keep gradients minimal, to stay true to that bold Medicom aesthetic.
Fine Detail / Intricate Art
Highly intricate designs need more stencil layers, more curing time, and more precision. We can absolutely do it, just know it'll affect the timeline and price accordingly.
Not Sure? Ask Us
Send us your idea and we'll give you an honest, no-fuss assessment of what's achievable, how long it'll take, and what it'll look like at the end.